SECTION 10.1 – POSTING A COMIC AND CHAPTERS
The steps to creating a comic are the same as creating a story and the same is true for posting your pages.
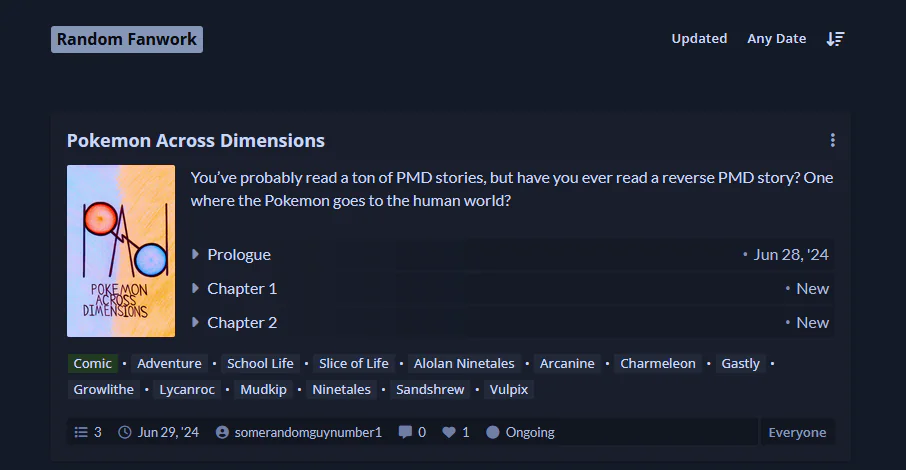
One way in which comic posting here works different from other websites is that, rather than having separate pages for each image PMDFF instead hosts all images of a chapter in a single container. Your Comic splash page is then organized by chapters.
PART 1 – CREATING A NEW STORY

First, we’re going to go to ‘My Profile’ and click ‘My Stories’.
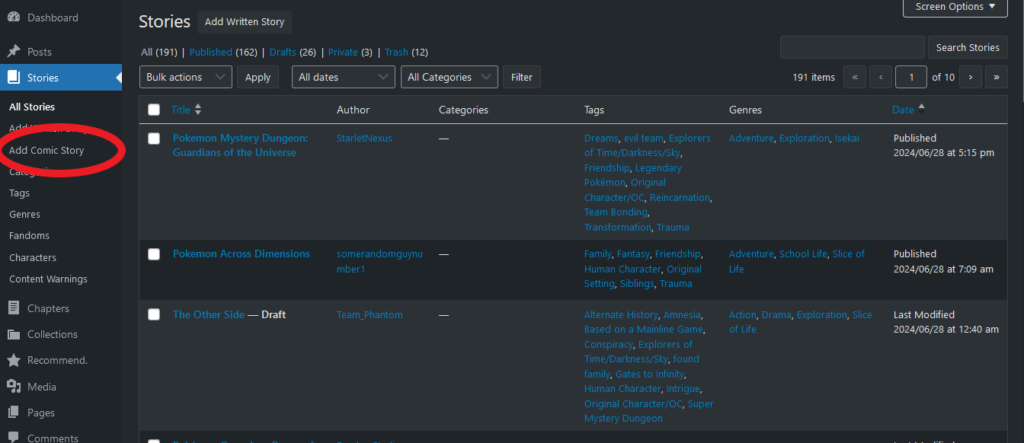
On the side bar you’ll see 2 kinds of stories you can add: ADD WRITTEN STORY and ADD COMIC STORY. Of course, because we’re looking to create a comic, we’ll select ADD COMIC STORY
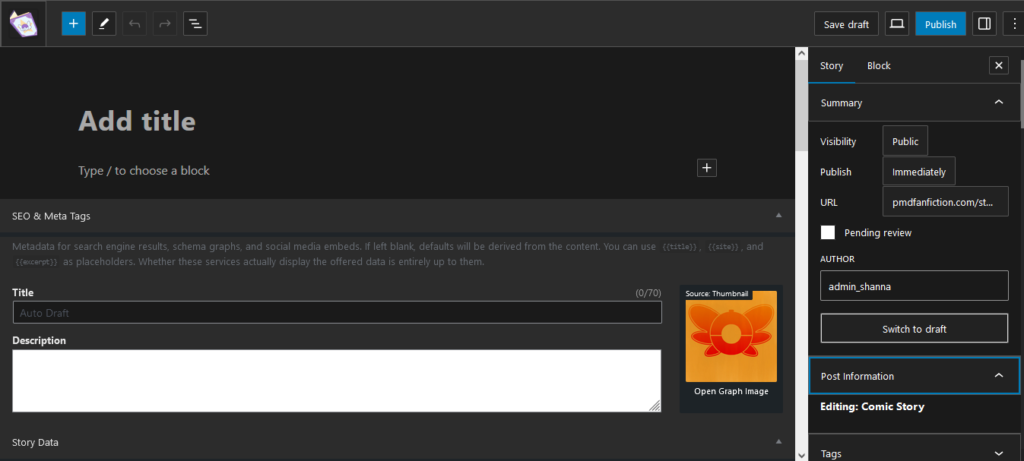
This will bring you to the story editing screen. This is where you can create your splash page and make it fancy with a description of your comic, images and links (please avoid any direct links to Paypal, Patreon, Kofi or other payment platforms).
Please also be sure your comic description is written in the space that says “Type / to choose block” — this is the body of the splash page.
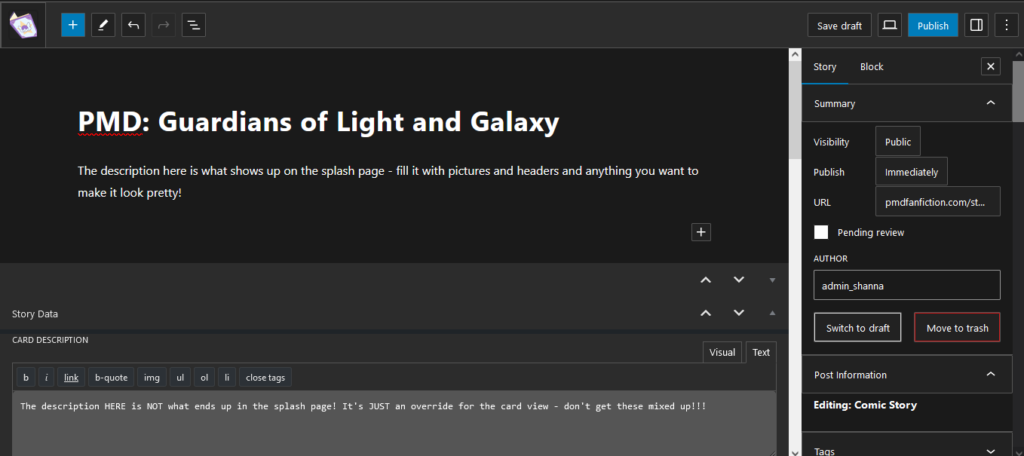
This is in contrast to the ‘Card Description’ which is just an override for what will be displayed for the comic’s card (as seen in searches) — by default, text from your splashpage is used:
Below that you have a space to add chapters and custom pages (Of course, we have no chapters yet!). The full write-up on adding custom pages (for extras like a character’s page, side stories and more to be included in tabs beside your chapters’ tab) is located here: [LINK]
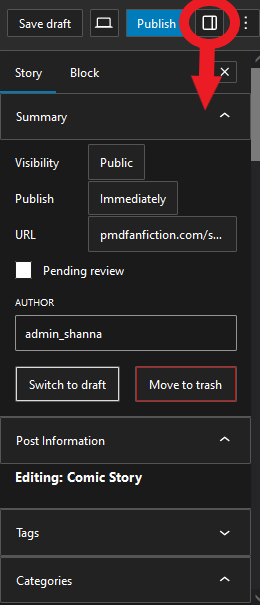
Just like with stories, you can use this button to bring up the side bar (this will apply to chapters, posts, pages, etc, so keep it in mind!)
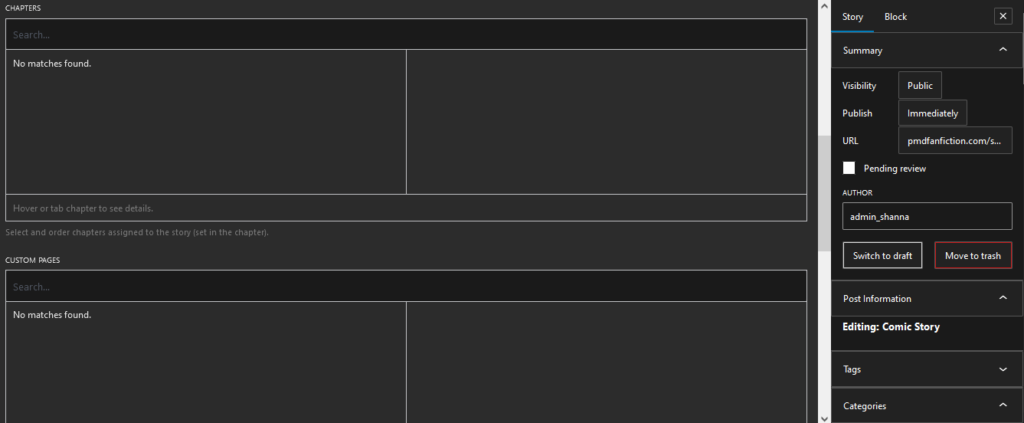
The side bar will be where you can apply content warnings, genres, etc to your story to make it easier to search on. You can use the button circled in red to open the side bar if it’s not already there.
One important option is the cover image:
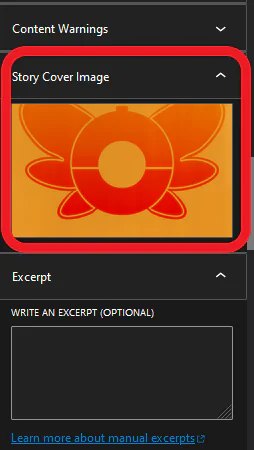
This will be where you can put an attractive image for your cover that’ll be visible from the card view. If you look in the media section of the uploader you’ll find some default cover images you can use for free.
When everything looks good, you can hit the ‘Publish’ button at the top right. This will post the comic to the site, though it won’t have any content.
Of course, if you’d rather work on chapters before posting your story, that’s perfectly doable. Chapters posted without an associated story will no be visible, which will let you work in peace until you’re ready for your story to really go live. In the next section we’ll cover posting a chapter.
PART 2 – CREATING CHAPTERS
As stated before, PMDFF works differently from most other comic-hosting websites. All pages of a chapter are placed on a single webpage which can then be scrolled through by users. How does this work in practice?
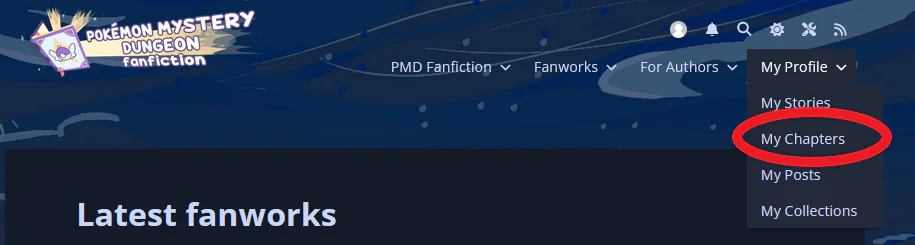
First, we go to this drop down menu and click ‘My Chapters’:
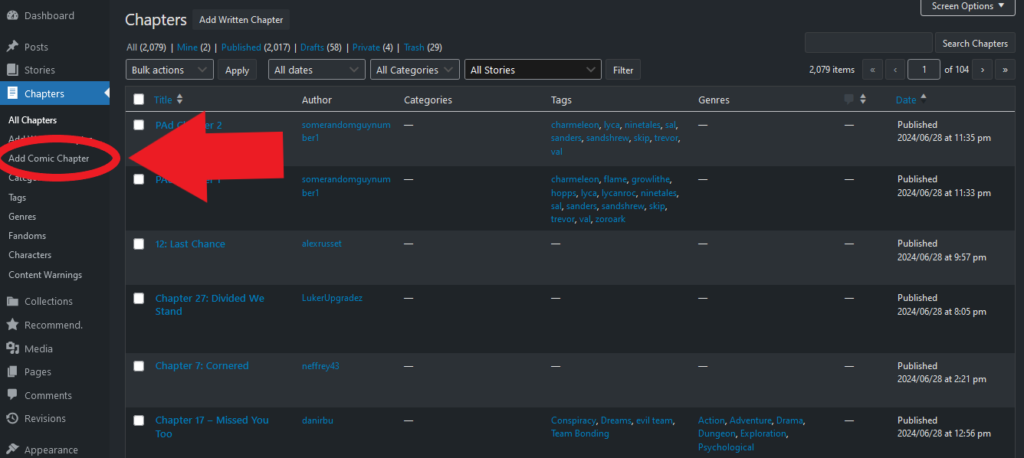
Once again, we have a difference between Comic Chapters and Written Chapters:
When entering the editor for a comic chapter, you may notice things are a little different. Instead of “Type / to choose block”, we’re met with a prompt to upload images:
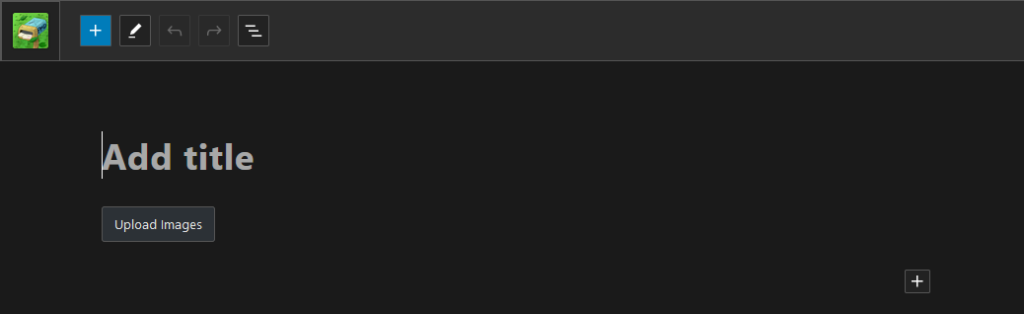
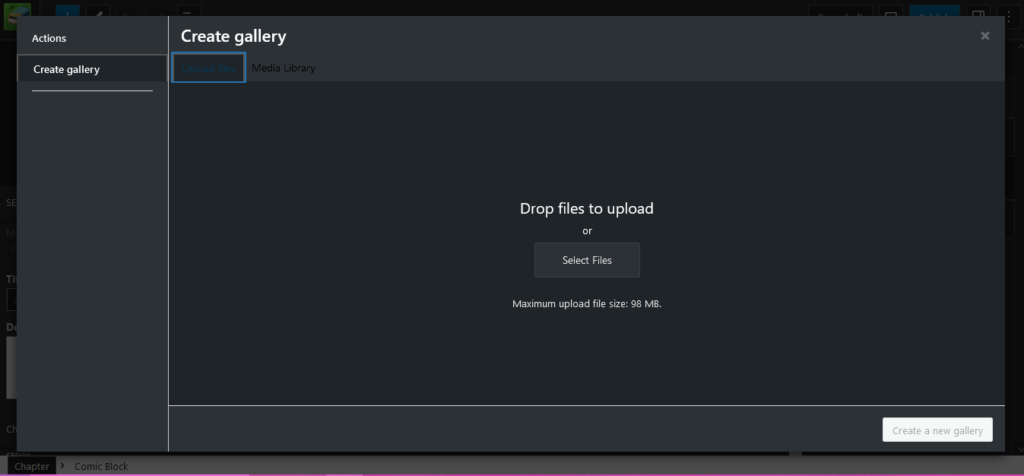
First, of course, we’ll put the name of the chapter at the top. Once that’s done let’s hit ‘Upload Images’, which brings us to your media library – any images you’ve previously uploaded will be here to choose from. If your comic pages are already present, you can click all the ones you want to add to this chapter. Otherwise, if this is a new comic then you’ll want to click the ‘Upload files’ tab here:

Here’s the upload screen. Easy as can be, just click+drag (or select via the upload window) all the pages that will be included in this chapter.
Once that’s done, your screen will look something like this:
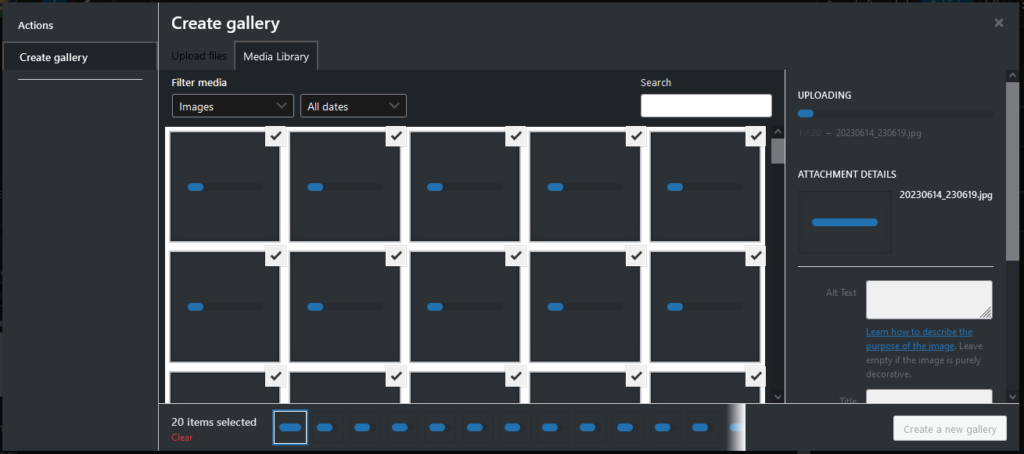
As you can see, all of these are now uploading in bulk. Once they’re finished uploading we can ensure they’ll all be automatically selected to be included in the chapter. So once they’re all uploaded we can hit ‘Create a new gallery’, which automatically brings us to the edit gallery window:
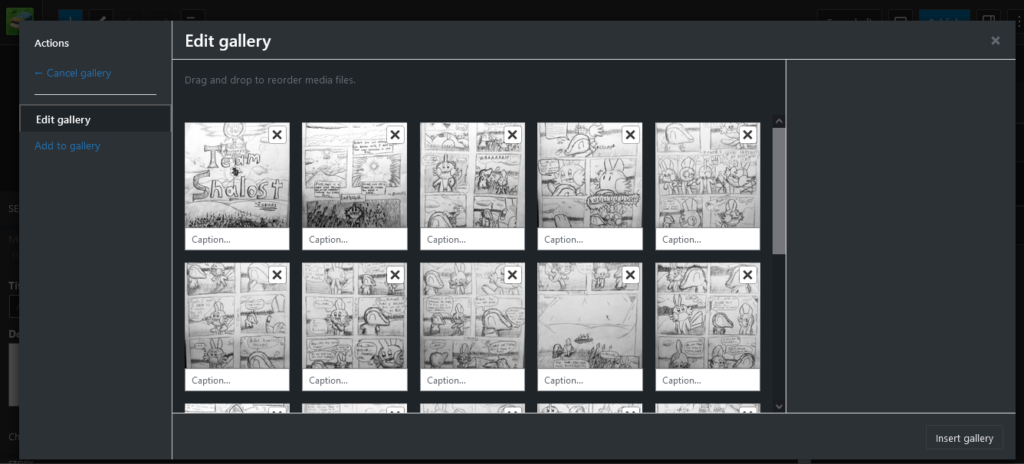
It’s here we can add captions to each of the images as well as rearrange them if any images are in the wrong order. Of course, you’ll be able to preview your gallery first. You can also add more pictures to the gallery with ‘Add to gallery’ on the side there. If everything looks good, hit ‘Insert gallery’ at the bottom right.
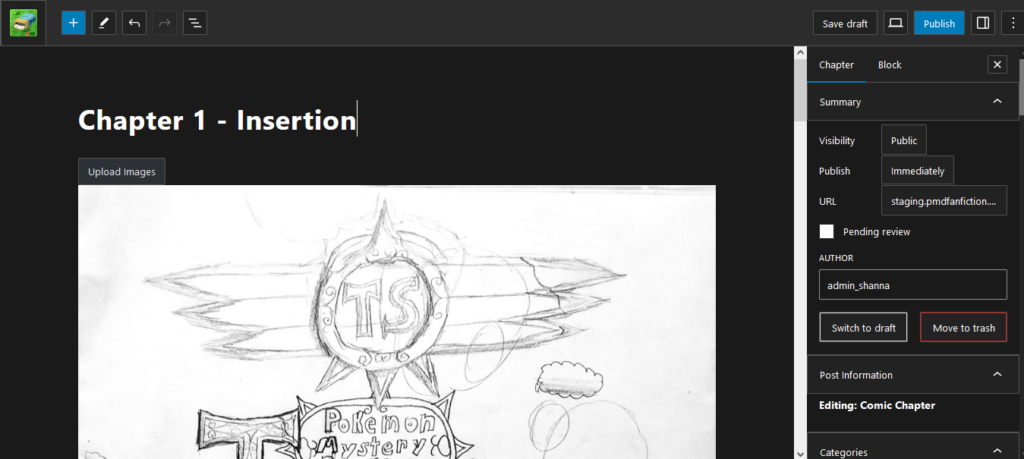
Now we have our comic chapter ready, but there’s still a few more options to go over.
First, since we all know that comic’s don’t usually get uploaded all at once, this means you’ll need to be able to add on to a chapter. This can be done with that ‘Upload Images’ button which will return you to the gallery edit window. There, you can add a new page if you’ve just finished one.
Scrolling to the bottom, we see this:

If there’s any description you want to add to the currently shown image, you can put it here. ‘Previous’ and ‘Next’ will cycle through the pages of your comic chapter, allowing you to put a description for each page as needed, as well as letting you verify all pages are in their correct order.
That’s all there is to the content of the chapter itself! Now we just need to take care of the final few bits of boilerplate work to finalize the chapter.
Scrolling down, we’ll see these options. They’re the same as the options in a written story:
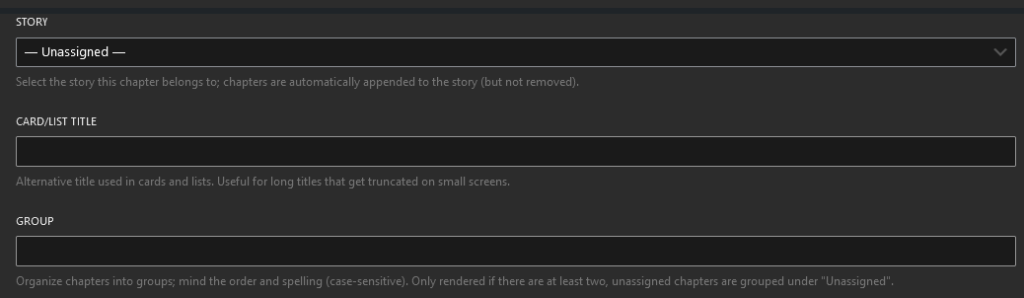
‘Story’ will assign this chapter to a story, placing it in that story’s chapter list.
‘Card/List Title’ is simply an override for what will display as the chapter’s name if it’s shown in a card format (such as in searches).
‘Group’ allows you to group chapters together, for instance if a number of chapters together form an ‘Arc’. If you give multiple chapters the same group name they’ll be listed under that group name in the story’s splash screen. NOTE: In order for chapters to be properly grouped together their group names MUST match VERBATIM (The case of the letters counts, too!!) — we’d recommend copy/pasting the group name to ensure there’s no errors with grouping.
Of course, once again, the side bar gives us various options such as choosing genre and content warnings for this chapter. You can even put warning notes to let people know if potentially upsetting things happen this chapter.
When everything is ready you can hit the big ‘Publish’ button and the chapter will automatically be applied to the story!
That’s all there really is to the basics of uploading a chapter. Of course, for more career comic-creators a few more tools are needed. We’ll go over these in the next section.
0 Comments